Finally got the spacers finished, they are plastic, but should be plenty strong enough for this application, and they were nice and easy to cut and drill :-)
This is the complete assembly of one side with the motor and some of the framework to weld into the chassis. Next step is to work out where to weld the framework to centre the wheels in the wheel arches. With a bit of luck it could be on all 4 wheels by the end of the weekend. At which time I'm going to realise i have nowhere to put it! :-)
Friday, 30 August 2013
Thursday, 29 August 2013
Dalek video
finished the buggy wheel adapters, they will be tomorrows update, hopefully!
tonight its the Video of the dalek in action.
This was the first test run, hence the lack of bumper, i hadn't got as far as putting it on yet.
Really pleased with how it went, we had cars stopping to take photos as they were going past.
Wednesday, 28 August 2013
More dalek goodness
Been making a pair of wheel adapters for the buggy to fit the rear wheels to the Motor flanges that's going to take me a couple of days so until then here is more dalek.
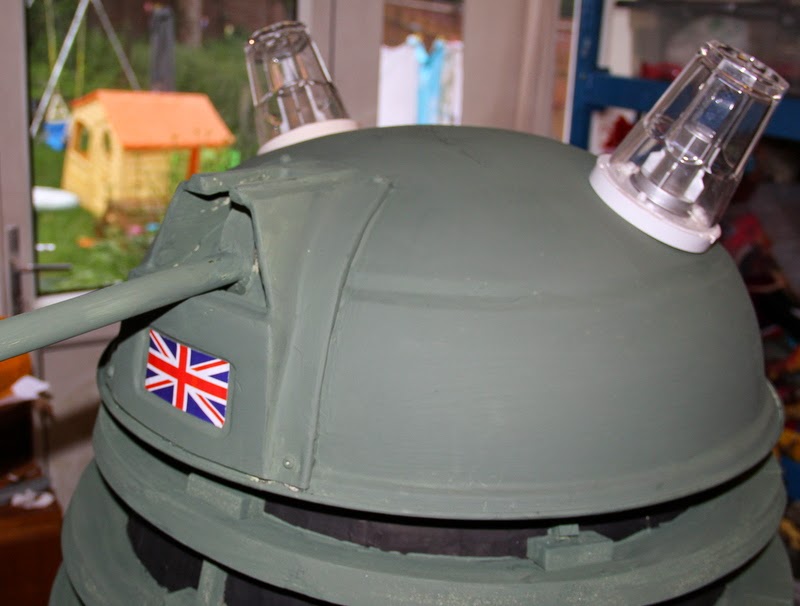
Here is a close up of the head, with the Union Jack, and plastic beaker eyes.
And here he is at the school fair where he went down a storm!
Video to follow...
Saturday, 24 August 2013
The next exciting episode of how to build a Dalek.
Did a little more buggy yesterday, but nothing worth taking a picture of. Discovered Ill need some wheel spacers/adaptors machined which may take some time.
So here is the next exciting episode of how to build a Dalek.
Paint! this is the first of three coats, needed to cover the foam. This coat is a little light, I started with a tin of olive green from B&Q and mixed in loads of different poster paints until I was happy.
And here he is together again. I'm working out the drive mechanism at this stage, which is a cut down electric wheelchair with the control box extended to give you a long cable remote.
The shoulders still look a little rough but they will be covered by the equipment these daleks carry.
So here is the next exciting episode of how to build a Dalek.
Paint! this is the first of three coats, needed to cover the foam. This coat is a little light, I started with a tin of olive green from B&Q and mixed in loads of different poster paints until I was happy.
Thursday, 22 August 2013
Just snatched a few Min's on the buggy, but its too dark for photos.
So here is more dalekness.
A slightly blurry shot of the skirt and shoulders with the hemispheres attached (80mm Styrofoam balls from ebay, for less than a tenner, 100mm balls were more than twice the price.)(100mm is the correct size but how many people know that!)
The Bumper and neck rings are all made in a dense urethane closed cell foam. this has a reasonable surface and takes paint quite well if primed.
Just in process of adding the foam to the shoulders, getting the correct glue was a challenge, but I found expensive hot melt glue sticks £5 for 5 sticks!!! were worth their weight in gold :-)
This was about the first time I actually built the stack, and i was over the moon! :-)
So here is more dalekness.
The Bumper and neck rings are all made in a dense urethane closed cell foam. this has a reasonable surface and takes paint quite well if primed.
This was about the first time I actually built the stack, and i was over the moon! :-)
Wednesday, 21 August 2013
buggy steering
Spent some more time working on the steering for the buggy, it will be a heavy thing, and with the size of the tyres as well it needed a "proper" steering system with some geared advantage. This is based on the seat runner mechanism from a top of the range car.
After cutting down the runner to a block holding the gear and welding on a 1/2 UJ from a socket set the steering is ready to mount.
Here is the front Axel tacked in place on the chassis.
Close up of the spindle and track rod ends, all from some sort of lawn tractor and via ebay.
Subscribe to:
Posts (Atom)